How do I enable Spam filtering for my domain using SmarterMail?
The following article explains how to enable Spam filtering. SmarterMail includes many advanced anti-Spam measures that will help keep away unwanted junk mail. Customizing Spam filtering for a domain will apply the filter settings to all accounts under the domain.
To set a Spam filter for your domain, please follow these steps:
- Open a browser window and go to one of the following URLs:
- http://mail.domainname.com
- http://mail#.safesecureweb.com (this address is provided in the setup email)
- Login as root@domainname.com with the password supplied in your setup email.
- From the top menu bar, click Settings.

- From the left side bar, expand Domain Settings.
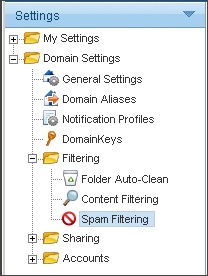
- Expand Filtering and select Spam Filtering.
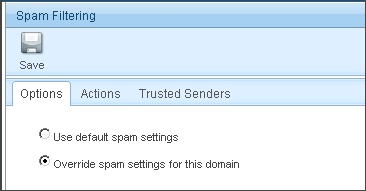
- Choose the Spam Option for your domain:
- Use default spam settings: this option accepts the default Spam options provided by HostMySite.com (the settings will be displayed for your reference). If you choose this option, please skip to step 9.
- Override spam settings for this domain: this option overrides the Spam options set by HostMySite.com, allowing you to choose specific actions to be performed on e-mails with a low, medium, or high Spam priority and also to assign individual "check weights" (for each check that an e-mail fails, a weight is added to its overall Spam probability score).
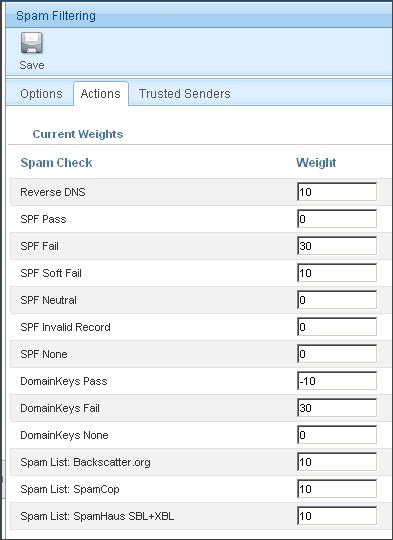
- On the Actions tab, adjust the weights according to your preferences:
- Reverse DNS: This check determines whether or not the mailserver delivering the message to your account has a Reverse DNS record. For example, Reverse DNS is now required by anyone sending a message to AOL clients, so if someone's server fails this test they would not be able to send a message to any AOL users.
- SPF Pass: Indicates that the email was sent from the server specified by the SPF record (more likely good mail). The weight you set may be 0 (for no effect) or a negative number, thereby reducing the Spam rating.
- SPF Fail: Indicates that the email was sent from a server prohibited by the SPF record (highly likely Spam). Set this to a relatively high weight, as the probability that the email was spoofed is very high.
- SPF Soft Fail: Indicates that the email was sent by a server that is questionable in the SPF record. This should either be set to 0 or a low Spam weight.
- SPF Neutral: Indicates that the SPF record makes no statement for or against the server that sent the email. Except in very special circumstances, leave this set to 0.
- SPF Invalid Record: Indicates that the email sender does not publish an SPF record or there is a syntax error in the record. Since SPF is relatively new, many legitimate domains do not have SPF records. It is recommended that you leave this at 0 until SPF becomes more popular on the Internet.
- Spam List: SpamCop: SpamCop runs a semi-automated system that accepts abuse reports from its members and submits complaints to the owner of the IP address referenced in the Spam message. Most SpamCop listings will disappear after 48 hours, however repeated complaints on an IP will lead it to a more permanent listing.
- Spam List: SpamHaus SBL+XBL: Spamhaus tracks the Internet's Spammers, Spam gangs and Spam services, provides dependable realtime anti-Spam protection for Internet networks, and works with law enforcement to identify and pursue Spammers worldwide. The SBL is a realtime database of IP addresses of verified Spam sources maintained by the Spamhaus Project team and supplied as a free service to help e-mail administrators better manage incoming email streams. The Spamhaus Exploits Block List (XBL) is a realtime database of IP addresses of illegal 3rd party exploits, including open proxies (HTTP, socks, AnalogX, wingate, etc), worms/viruses with built-in Spam engines, and other types of trojan-horse exploits.
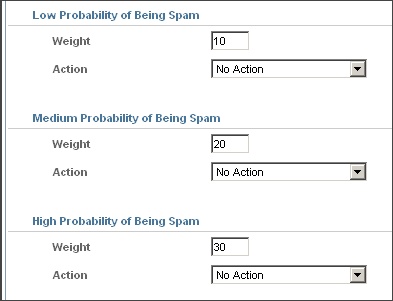
Note: The above Spam lists are online 'blacklists' that will list a domain or IP address for Spamming. These blacklists are run by organizations with no affiliation to HostMySite.com, however they have served as a fairly reliable resource for many Internet users over the past few years. The determination of what gets listed with each organization is based on their criteria, so any false positives must be addressed directly with them. - For each Spam level (Low, Medium, and High), choose the Weight and Action for an e-mail. If you choose to add text to the subject line of messages, enter it in the text box below the action drop down menu. The actions are defined as:
- No Action: nothing is done to the email message
- Delete Message: the email message is immediately deleted
- Move to Junk E-Mail folder: the email message is moved to the junk email folder (a default folder created by SmarterMail)
- Add text to subject line: additional text can be added to the subject line of the email message
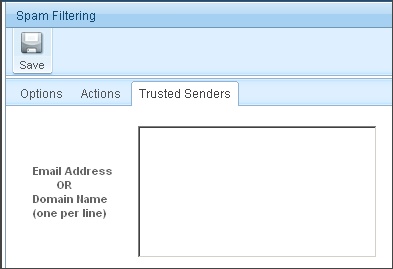
- On the Trusted Senders tab, enter the email address(es) that will not be checked by the Spam filter. Enter one email address or domain name per line.
- Click Save.
Additional Support Topics