How do I use the Advanced DNS Manager?
The following article explains how to use the Advanced DNS Manager to add, modify and remove DNS records for your domain name. You also have the option to add and manage DNS information for your additional domain names and domain name pointers. Please use caution when working with your DNS records as you could potentially disable your domain name.
To manage your DNS records, please follow these steps:
- Open a browser window and go to www.HostMySite.com
- Click on Control Panel Login.
- Log into the Control Panel as one of the following:
- Account Administrator and select the appropriate domain
- Technical Contact for the domain
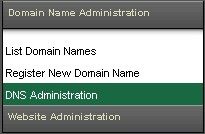
- Click on Domain Name Administration and select DNS Administration.
- If you have more than one domain, select the appropriate domain name from the list shown. If you have a large number of domain names, you can use the search feature or click Click here to see a list of all your domains.
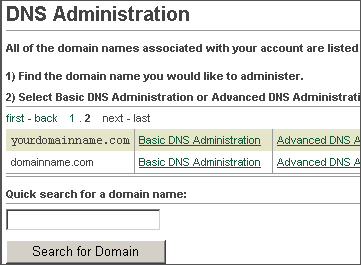
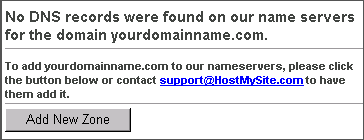
- Click on Advanced DNS Administration. If you currently do not have a DNS record for this domain, you will be prompted to add a new zone (see instructions below).
To add a new DNS zone for your domain name, please follow these steps:
- Click Add New Zone.
- Enter the IP Address where you would like your domain name to point.
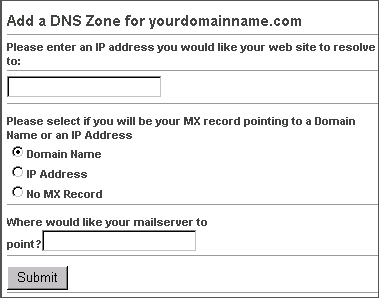
- Select the location for your mail (MX) record:
- Domain Name: points your mail to the domain name of the mail server you wish to use, for example, mail1.safesecureweb.com
- IP Address: points your mail to the IP address of the mail server you wish to use
- No MX record: if email is not available for this domain name, use this option
- Based on your selection in step 3, enter the domain name or IP Address of the new mail server location.
- Click Submit.
To add a new DNS record to your domain, please follow these steps:
- Click Add Record to yourdomainname.com.
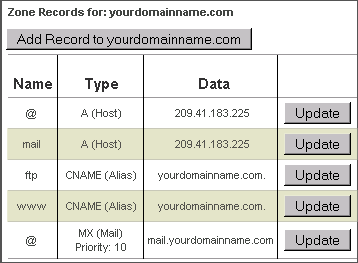
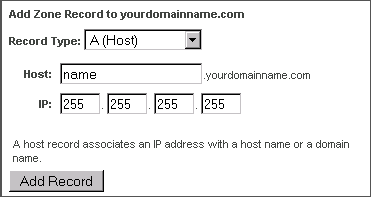
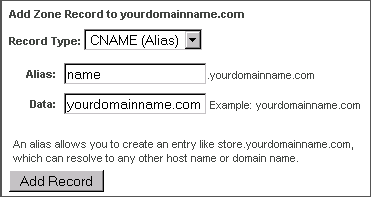
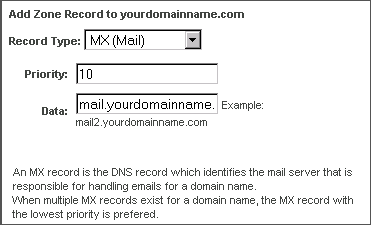
- Select the type of record you wish to add from the dropdown menu:
- A (Host): enter a name for the record and the IP address where the name will point
- CNAME (Alias): enter a name and a domain name where the alias will point
- MX (Mail): enter the priority and the name of the mail server
- A (Host): enter a name for the record and the IP address where the name will point
- Click Add Record.
To update a DNS record, please follow these steps:
- Click Update for the record you wish to update.
- Enter the new information.
- Click Update.
To delete a DNS record, please follow these steps:
- Click Delete for the record you wish to delete.
- Click Ok to confirm the record deletion.
