How do I utilize Tasks?
The following article explains how to utilize tasks. Tasks can be created to keep track of your activities in one place. Once a task is added, you can track your progress on that task, including the status, due date and percent complete. Each user has their own task list. They can share their task list to other users if they wish.
To access the task list, please follow these steps:
- Open a browser window and go to one of the following URLs:
- http://mail.domainname.com
- http://mail#.safesecureweb.com (this address is provided in the setup email)
- Login using your email address and password.
- From the top menu bar, click Collaborate.

- From the left side bar, click Tasks.
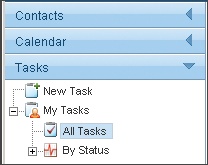
- Expand My Tasks and click All Tasks.
To add a new task, please follow these steps:
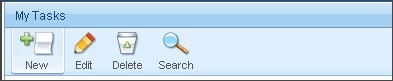
- Access your tasks using the steps described above.
- Click New Task.
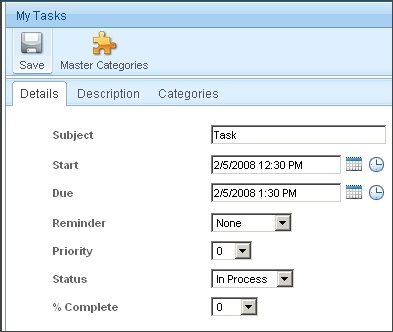
- Enter the requested information:
- Subject: a brief description of the task
- Start: the start time of the task
- Due: the end time of the task
- Reminder: set the time before the task begins to send an email notification (optional)
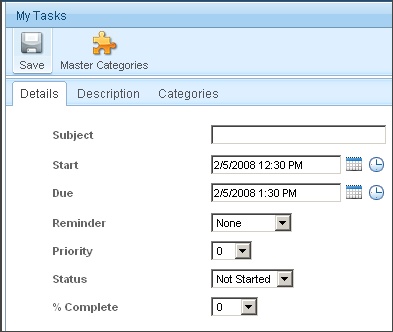
Note: The remaining options are optional and can be filled in at your leisure.
To update a task, please follow these steps:
- Access your tasks using the steps described above.
- Select the task and click Edit.
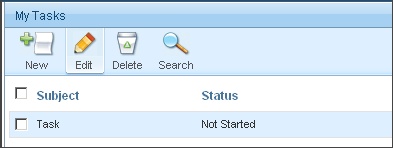
- To update the status, select the new status:
- Not Started: the task has not begun
- In Progress: the task is still in progress
- Completed: the task has been completed
- Cancelled: the task has been cancelled
- To update the percent complete, select the appropriate percentage.
- Click Save.
To share the task list, please follow these steps:
- From the top menu bar, click Settings.

- From the left side bar, expand My Settings.
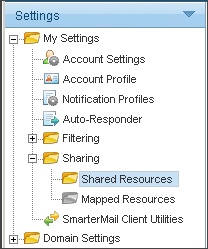
- Expand Sharing and click Shared Resources.
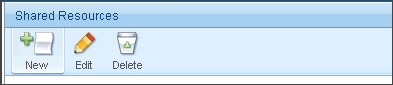
- Click New.
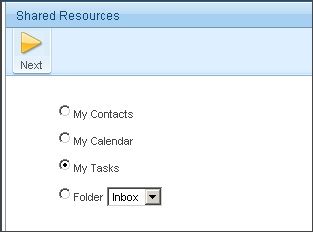
- Select My Tasks and click Next.
- Enter the user(s) to share the task list with.
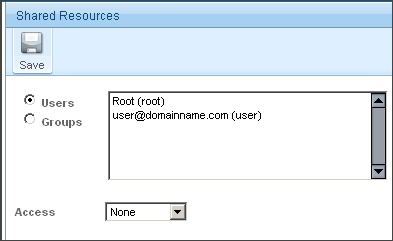
- Select the type of access to grant the user(s):
- None: Your tasks are not shared with the user. This setting is useful if you give permissions to a group but want a specific user to be denied permission.
- Read-Only: Grants view access to the task, which lets the other user see your information, without granting any permission to change or modify the task in any way.
- Full Control: The user that has this permission can do everything on the task that you can, including moving due dates, changing progress, and even canceling the task.
- Click Save.
Additional Support Topics