How do I manage documents in SharePoint?
The following article explains how to manage documents in SharePoint. Documents are stored within a document library that needs to be created first. Instructions for creating a document library can be found here. Documents can be stored in the main area of the document library or organized into folders.
Note: SharePoint will only work properly in Internet Explorer.
To manage your documents, please follow these steps:
- Open a web browser and log into SharePoint.
Upload a document | Create a folder | Edit a document | Delete a document | Check In/Out a document
Upload a document
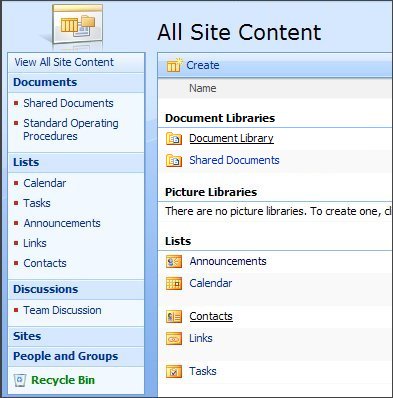
- Click View All Site Content.
- Under Document Libraries, click the appropriate document library.
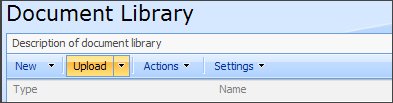
- Click Upload.
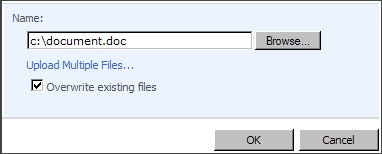
- Browse to the file you wish to upload and click OK.
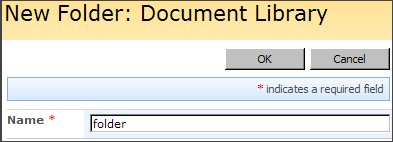
Create a folder
- Click View All Site Content.
- Under Document Libraries, click the appropriate document library.
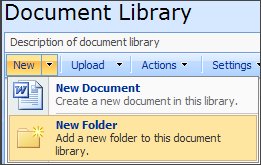
- Click the arrow to expand New and select New Folder.
- Enter the name of the folder and click OK.
Edit a document
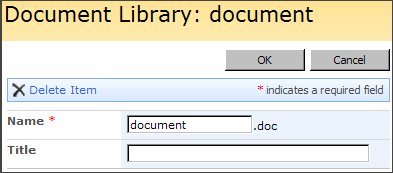
There are two ways to edit a document in SharePoint. The first is to edit the properties of the document, including the name and title. The second is to edit the document itself using the appropriate Office program based on the type of document.
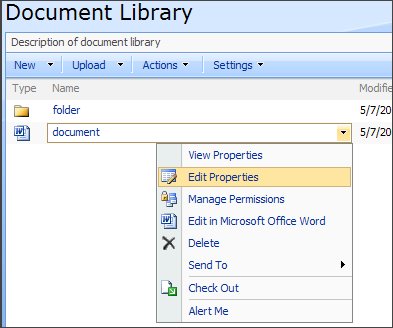
- Click View All Site Content.
- Under Document Libraries, click the appropriate document library.
- Point to the document you want to edit, click the down arrow on the menu that appears, and then click Edit Properties.
- Change the fields as desired, and then click OK.
To edit the document, please follow these steps:
- Click View All Site Content.
- Under Document Libraries, click the appropriate document library.
- Click the document icon to open the document in the appropriate program.
- Make the necessary changes and save the document. The changes will be reflected in SharePoint.
Before making changes to the document, it is recommended that you check out the document so that other users cannot make changes. Instructions for checking out a document can be found below.
Delete a document
- Click View All Site Content.
- Under Document Libraries, click the appropriate document library.
- Point to the document you want to delete, click the down arrow on the menu that appears, and then click Delete.
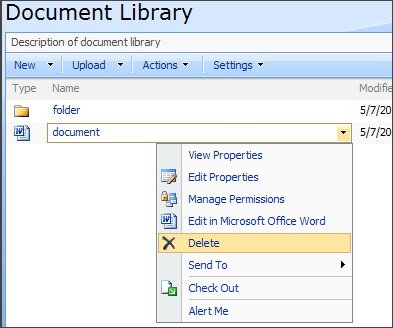
- Click OK to confirm.
Check In/Out a document
Before editing a document, it is recommended that you check out the document. This will inform other users that the document is currently in use. Once checked out, no other user may make edits to the document. The edits being made will not be reflected until the document is checked in. Once the document is checked in, other users see the changes and may check out the document if they need to make additional changes.
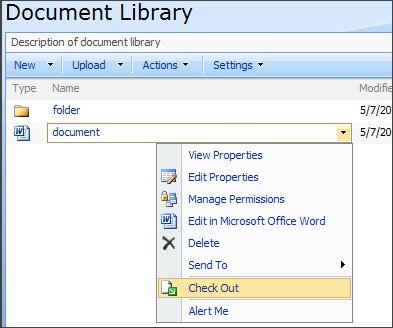
- Click View All Site Content.
- Under Document Libraries, click the appropriate document library.
- Point to the document you want to check out, click the down arrow on the menu that appears, and then click Check Out.
Users will now see the document as checked out. This will prevent them from editing the document. Changes made to the document will not be visible until it is checked in.
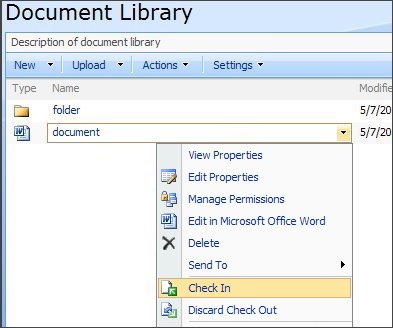
To check in a document, please follow these steps:
- Click View All Site Content.
- Under Document Libraries, click the appropriate document library.
- Point to the document you want to check in, click the down arrow on the menu that appears, and then click Check In.
- Choose whether to keep the document checked out after checking in the new version.
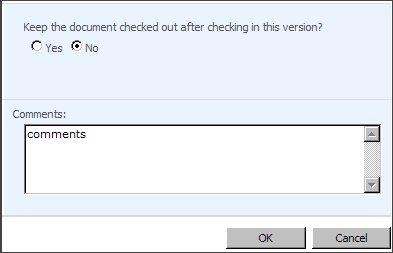
- Add appropriate comments.
- Click OK.
Additional Support Topics